
Create Invoice
Create professional invoices and email them to your customers to collect payments faster. Utilize the Invoices module in the Accosis Collect Dashboard to send, manage, and track invoices efficiently.
Note:Before generating an invoice, ensure you've entered essential details such as company information, bank account details, and contact information. Refer to this guide.
How to Create Invoice
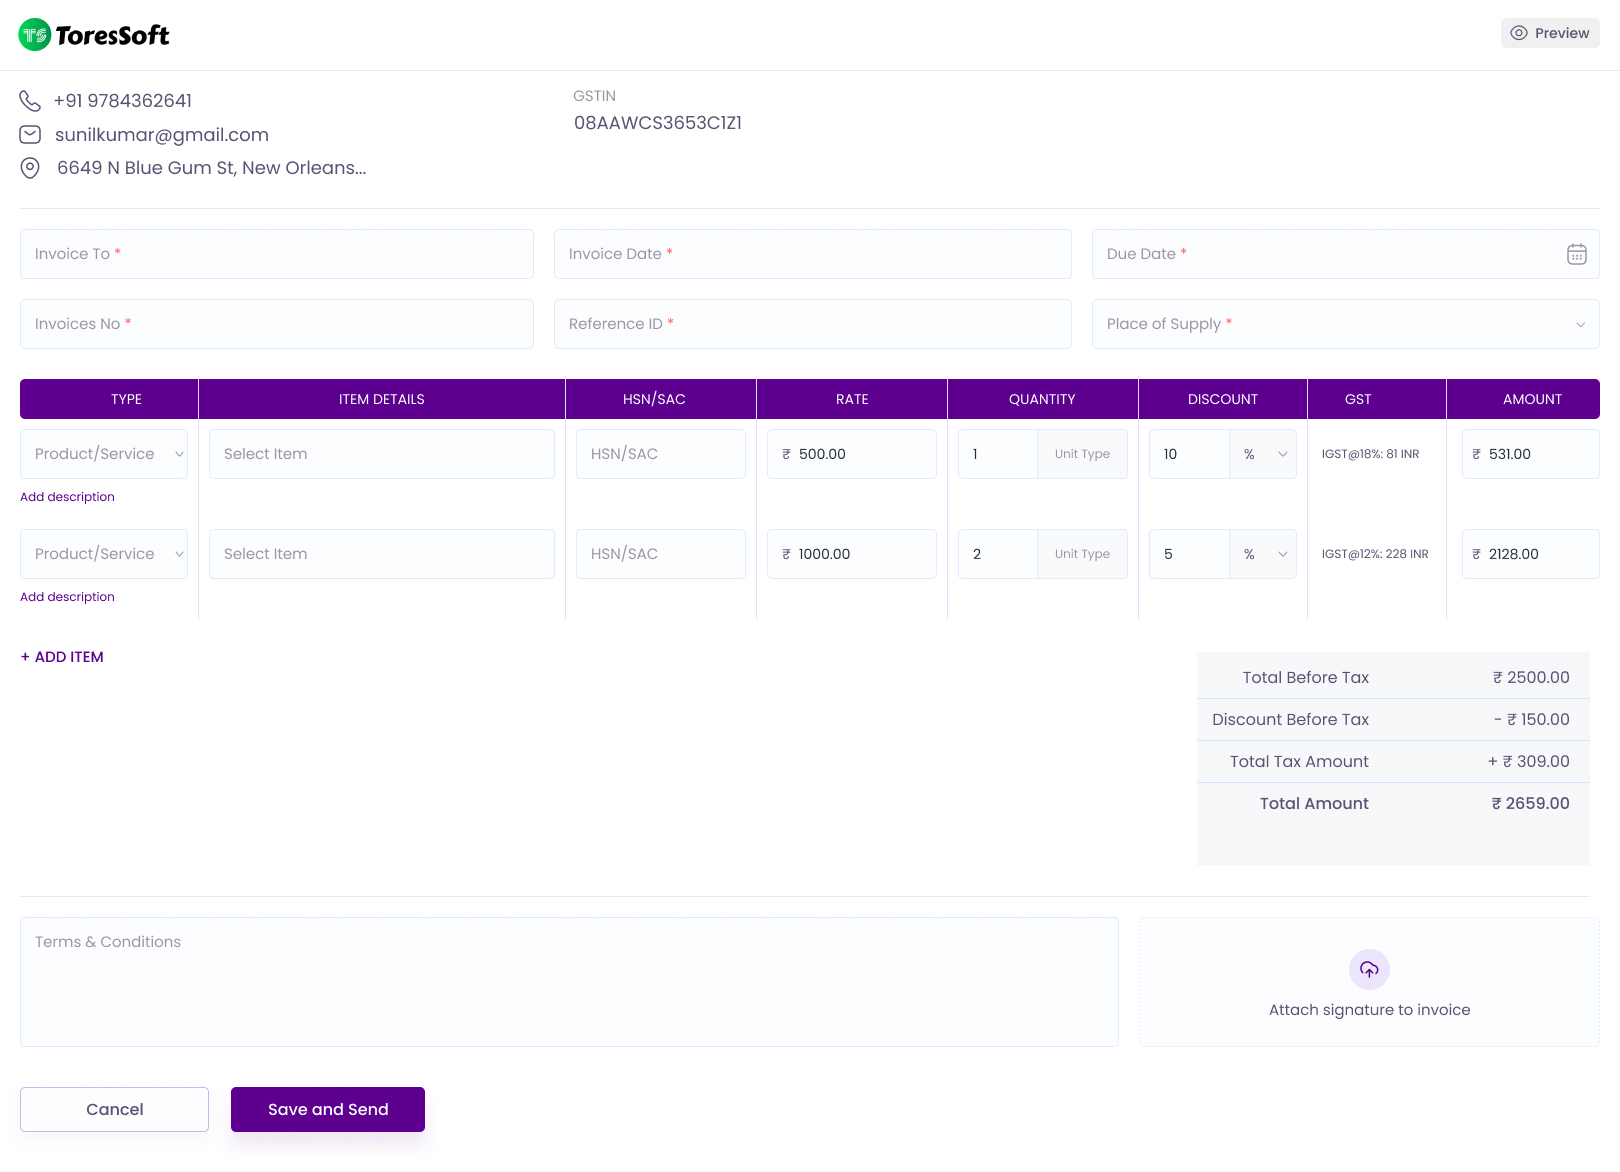
Preview of Create Invoice
Create Invoice
- Go to the Payment > Collect > Invoices.
- Click on the "Create" button at the top left of the Invoices dashboard.
- The Create Invoice page will open as shown in the images above.
- Fill in the following information in the invoice contact:
- Invoice to - Select a previously saved contact or create a new from the options.
- Invoice Date - Select the date of the invoice.
- Due Date - Set the due date for your customer.
- Invoice Number - This is a prefix number that can be changed in Settings > Company Details.
- Reference ID - The system will auto-generate a Reference ID.
- Place of Supply - This field will be auto-filled based on the customer's address.
- Fill in the following information in the invoice Item details:
- Type - Select either Product or Service.
- Item Details - Choose a saved product or service from the list or create a new one by clicking "Add New".
- HSN/SAC - The HSN/SAC code will auto-apply if the item has one.
- Rate - The rate will auto-apply from the saved item, or you can enter it manually.
- Quantity - Enter the quantity of the item.
- Discount - Set a discount for your customer.
- GST - GST will be automatically applied based on the customer's address and selected items.
- Amount - The final amount will be displayed after all calculations.
- Invoice Footer:
- Terms & Conditions - Enter your company's terms and conditions. The terms and conditions template can be saved in settings for time-saving convenience.
- Signature - Upload your digital signature. Save it in settings for quick access and efficiency.
Invoice Preview.
After entering all required information, the invoice has an option to preview before finalizing.
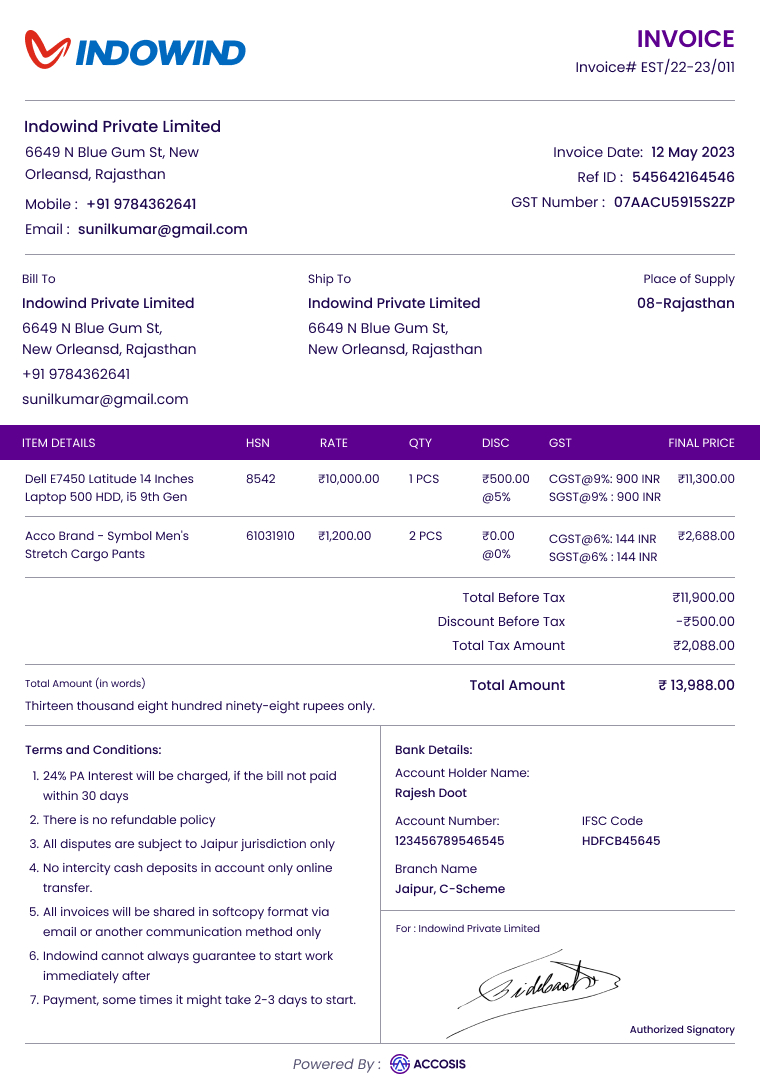
Invoice Preview
Note:Once all fields are reviewed, click the "Submit" button located at the bottom of the create invoice page. The invoice will automatically be sent to the customer's email address. Merchants can monitor payment statuses and other details on the invoice dashboard.
Updated 3 months ago